An LED light is a very efficient replacement for incandescent lights and acts as an aesthetic addition to your bedroom with custom-led lights. The benefit to an LED strip light is the customization available.
You can cut off pieces and reattach the custom led strip sizes as needed to decorate your entire room. Furthermore, you can also change the lighting as per your mood, increase brightness, and even combine the colorful led strip lights to create an imprompt UV light emitter.
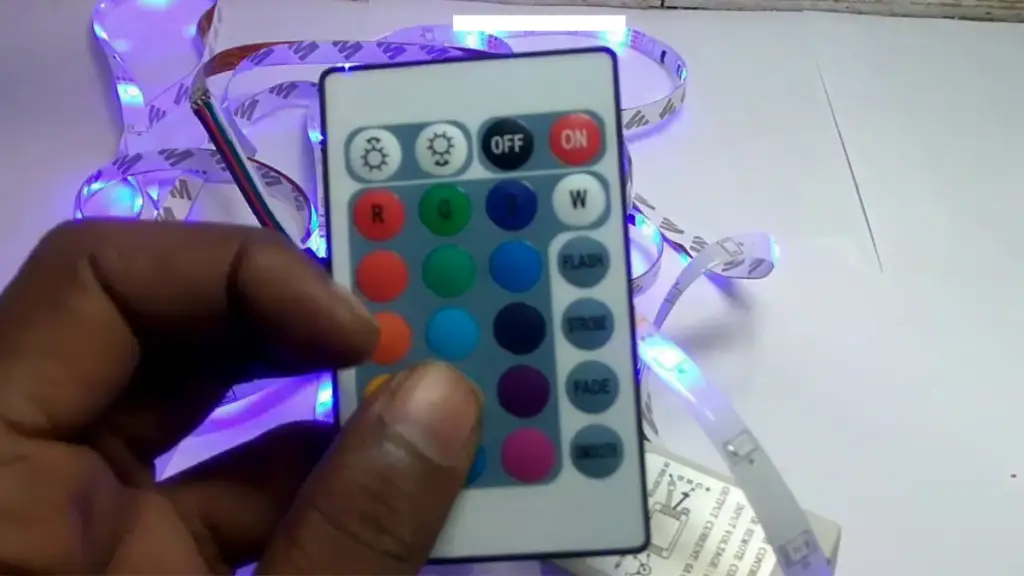
All of these actions are usually done through the use of the provided remote along with your led strips. A common issue with such led remotes is that they might easily break down.
This is nothing serious and can usually be fixed with a changed battery. Maybe even getting a new remote. In this article, we will discuss common methods that will teach you how to reset led lights remote.
Why Does the LED Light Remote Not Work?
First and foremost, you need to know what causes the issues with a remote. An LED remote might stop working due to many reasons. The easiest solution is to check the batteries. Maybe the batteries died and must be replaced.
A slightly complex problem might be the pairing of the remote with the led lights. If it isn’t correctly paired, the remote won’t have any device to connect with and cannot control the lights.
If you are facing other issues, there are ways to reset the remote that will be discussed going forward.
What To Do When LED Light Remote Do Not Work? (Quick Overview)
If your remote is malfunctioning, you might be facing one of the following problems with your device. The corresponding problems will have some easy remedies listed alongside them to help you understand how to reset led lights remote.
Batteries: The batteries might be dead from prolonged storage or just degrade over time of use and storage.
Replace the Battery with a new pair. The most common ones are the CR2025 batteries that should be available almost everywhere.
Pairing: It is possible that the device somehow managed to unpair itself. In such a case, then you will have to reconnect or the led strips will not respond.
– Disconnect the circuit and remove the battery for safety
– Unplug the dimming wire from both ends
– Plug the wires back in and reinstall the batteries.
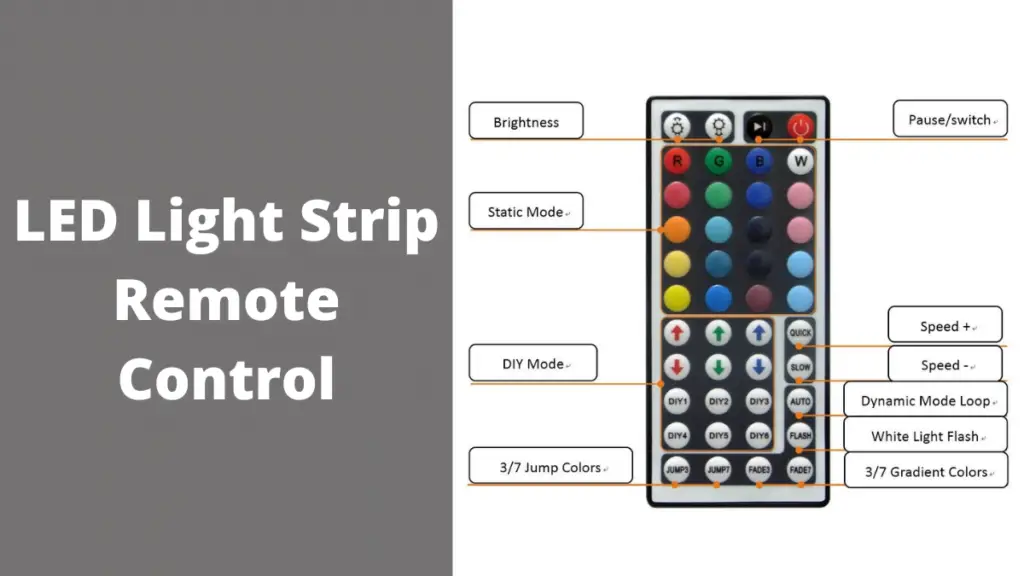
– Follow the pairing instructions given in your manual on which buttons to use. The most common method is to hold down the ‘Speed +’ and ‘Speed –‘ buttons for a few seconds. A blinking indicator will signal your pairing.
Remote Chip: Finally, the remote chip inside the controller may be broken or malfunction. There is a simple way to fix this and frankly, reconstructing an entire remote chip shouldn’t be on your to-do list anyway!
– You will have to repurchase a remote and pair it with your circuit similar to our previous method.
Process: How to Reset LED Lights Remote
The remote is the most important part of the circuit to control the color arrangement as well as the brightness. So, it is important to keep the remote up and running otherwise the entire led circuit won’t be worth anything.
Below, we have to list some common issues with an in-depth step-by-step explanation so you can fully understand how to reset the led lights remote all by yourself.
Method 1: Firm Reset
A hard reset is defaulting to the initial settings of the remote. This is done when the remote is unable to record any of your input. If you press a button and it does not operate, then you may have to reset the remote itself.
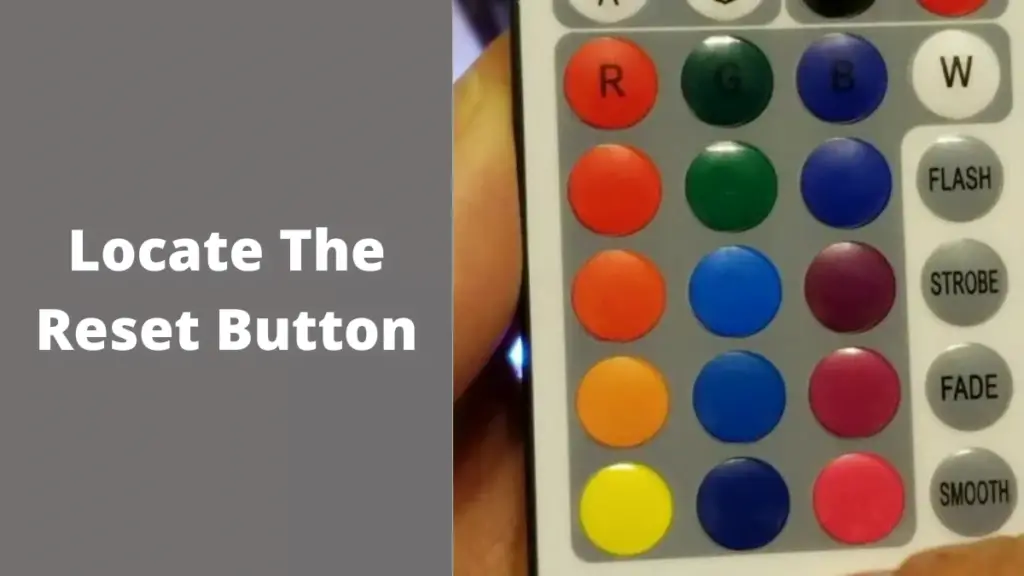
Step 1: Locating the reset button
There should be a reset button in your controller. It may be at the back or on one of the sides. The button should also have a tiny hole next to it. You must locate the button first.
Step 2: Activating the reset button
The target is to activate the button in the small hole. You can use a paperclip or an object with a small tip inside the hole until you feel the button is pressed. You will have to hold it down for a few seconds.
Step 3: Testing
Once you reset the remote, you will have to test it to see if it works. Turn on the circuit and press your buttons to see if the inputs are working or not.
Method 2: Taking Out the Batteries
If resetting the remote doesn’t work, you might need to replace your batteries. Sometimes, a new fresher battery will make the remote work compared to the old used one.
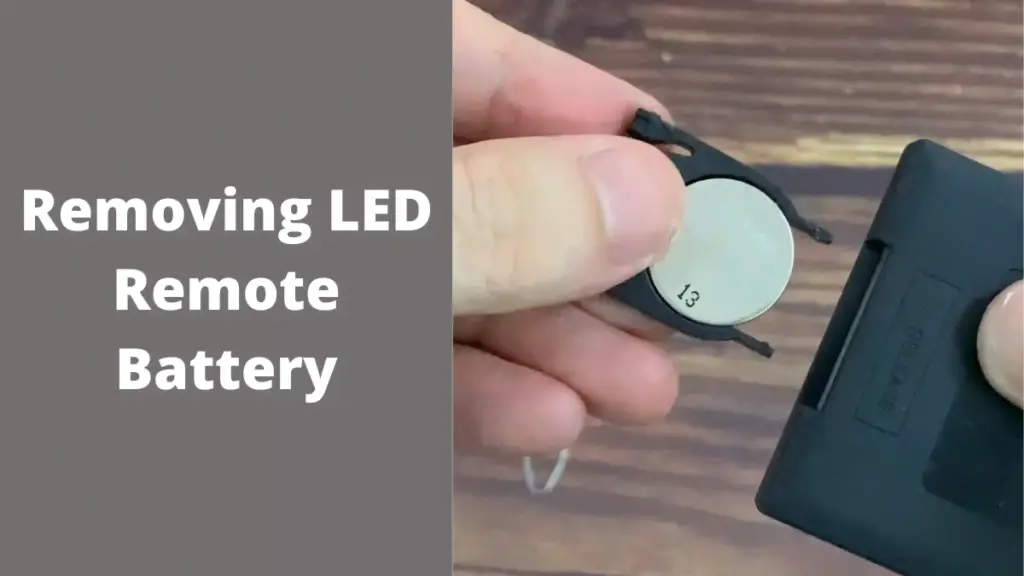
Step 1: Remove the Battery
The battery is located on the remote and the cover might be screwed in with a bolt. Use a screwdriver if needed to open the cover and remove the battery.
Step 2: Power Cycle
After removing the power, it is a good idea to press the power button for a while. This will remove any residual power in the remote and fully drain it.
Step 3: Replace the battery
Add in your replacement battery and restart the device. The remote should be working properly this time.
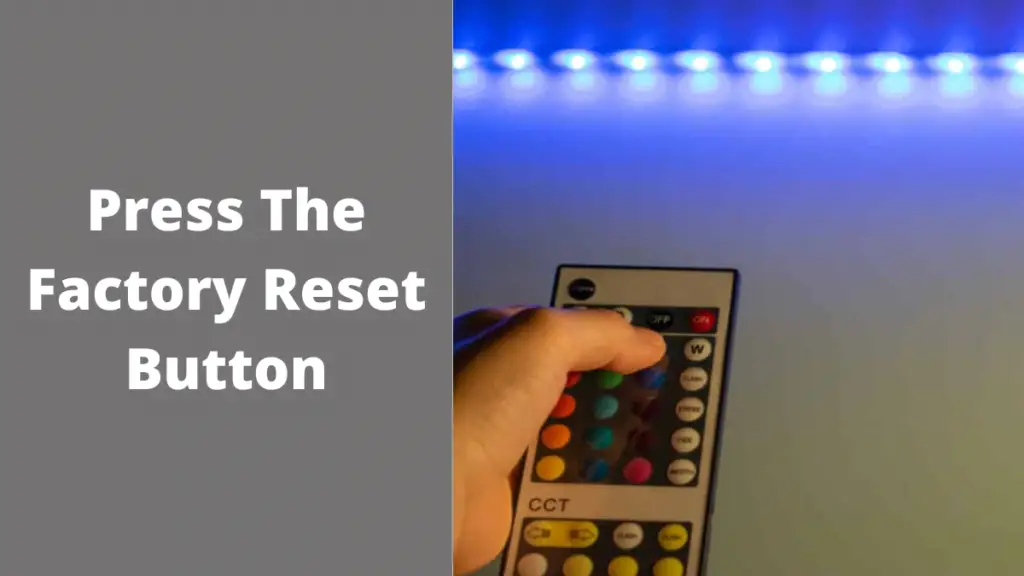
Method 3: Factory Reset
If your device is still not working, it might be best to reset it completely. It is different from a firm reset in the sense that the device will have to be repurposed manually to connect with your circuit.
Step 1: Locate the Reset Button
Like before, you will first have to locate the button on the remote. The reset button will be beside a small hole which will need to be activated to reset the remote and reprogram it.
Step 2: Pressing the Reset Button
You will need a thin and firm object to press the reset button. Using a paper clip or a sharp object is a solution. The object will need to be pressed for 3-5 seconds. The led light on the remote will light up and flash, meaning that the reset was successful, and you will have to program it.
Step 3: Reprogramming
You need to follow the programming instructions that came with your LED light after you’ve reset the remote. These instructions will change depending on the brand and model of your light, but they should be fairly simple to understand.
Follow the instructions for your make and brand and your remote should work well as new.
These are some of the methods to follow if you want to know how to reset led lights remote.
Do Led Lights Work Without A Remote?
LED lights can work without a remote. Some led strips have a built-in switch that can operate without a remote. You can also directly wire the lights to a power source to use them. However, you will not have the desired flexibility like custom-led lights and colorful strips. The customization is almost always connected with a remote.
How Can I Control LED Light Without Remote?
You can avoid reset led lights remote by using the led lights directly. You can do this in several ways, but the purpose of an led light may be to provide aesthetics and that is difficult to achieve without a remote controller.
1. By plugging directly into a power strip, the lights will be usable using a switch just like any regular ceiling light. However, you cannot control the brightness or the colors of the LED provided it can perform those actions.
2. You can also install a dimmer to control the brightness of the led strip. A dimmer can control the brightness by adjusting the power output to the led strips.
3. A viable option is to use a wireless switch. If the service is available, you might be able to connect the led strip to your smartphone via certain apps. This will help you to control the lighting and the brightness directly from your phone without using an external controller.
4. A microcontroller is used to connect all the wires with a separate device called a microcontroller. This will allow you to control the output of each of the colors through the device.
However, it is advisable to make sure that your power source can provide enough voltage to run the three wires separately and not cause a failure.
5. A Power Distribution Board splits continuous voltage from a central source to each of the color-changing lights. The RGB strips can simultaneously be adjusted to emit the desired color through a PDB.
The circuit can be wired to provide the same voltage as well and modified using transistors or resistors. This is one of the more flexible options available.
6. When finding ways to wire RGB led strips without a controller, using a transistor may not be the first choice. An N-Channel MOSFET is a transistor. It can be configured to control the flow of electrons through the circuit.
Therefore, low voltage can be distributed evenly all over the circuit. However, if you wish to run the lights at maximum brightness, you will need to simultaneously power all three wires.
7. Installing a smart home system will allow you to control your LED lights from anywhere. With these systems, you can use an app on your smartphone to control your lights and other devices.
Frequently Asked Question
Can You Use Another Remote For LED Lights?
You can use alternative remotes for your led lights. Remote control is just a device to connect your appliances. If you use an external remote, you will have to connect it with your circuit wires or Bluetooth. Sometimes it can be done via the internet as well.
How Can You Control Your LED Lights With Your Phone?
Today, there are a lot of applications that are a part of a smart home system. Similar apps can be used to connect your led strip lights to the system and then you can control the brightness and color of the led through your phone via the app.
Read also: Can You Cut LED Light Strips?
Final Words
The best choice is to use the controller provided by the company with the led strip light you purchased. If by any chance, the controller stops working, you now know the issue isn’t as severe as you might’ve thought. It is very easy to fix a malfunctioning remote with a few hours of work. It is also very cheap to replace parts of the device.
Still, if all else fails, you can just purchase a new controller from the multitude of stores available in the market. There isn’t a huge difference between what controller you are using so don’t hesitate to replace your old controller for some ease of access!
Related Articles…
How to Connect Multiple LED Lights to One Switch
How to Reduce Glare From LED Lights
Is It Safe to Cover Led Lights
How to Connect Led Strips Without Soldering
How to Change Bathroom Ceiling Light Bulb

My strong expertise is illuminating spaces. With a keen eye for detail and a passion for transforming environments through lighting, my dream is to leave indelible mark on the world of light design. Below are few facts of my biography, highlighting career and hobbies. Click here to contact me.