So you’ve been wanting to decorate your room or your house for a while now and you finally decide to purchase a long strip of LED lights. Problem is, you want to light up different areas that aren’t close to each other.
It’s way too expensive to buy separate LED strips for each and every area. You’re wondering if only there was a way to cut the strip into separate parts without ruining it.
Well, you’re in luck.
With the right product and the right procedure, it is actually very easy to cut LED light strips into multiple parts.
In this article, we’ll look at exactly how you should approach cutting an LED light strip as well as a detailed procedure on how to do it. We’ll go over information regarding what types of LED light strips work best for this method.
We’ll also discuss some common questions and misconceptions regarding cutting LED strips.

In the realm of electrical systems, the concept of voltage drop plays a pivotal role in maintaining the efficiency and reliability of circuits. At the heart of this discussion is the ubiquitous 12V power supply, a standard in many applications ranging from automotive to residential settings.
Understanding voltage drop becomes paramount when considering the transmission of electrical energy across various components, and it is essential to scrutinize both positive and negative aspects of the circuit. This delicate balance ensures that the intended voltage reaches its destination without significant loss, guaranteeing optimal performance and functionality in diverse electrical systems.
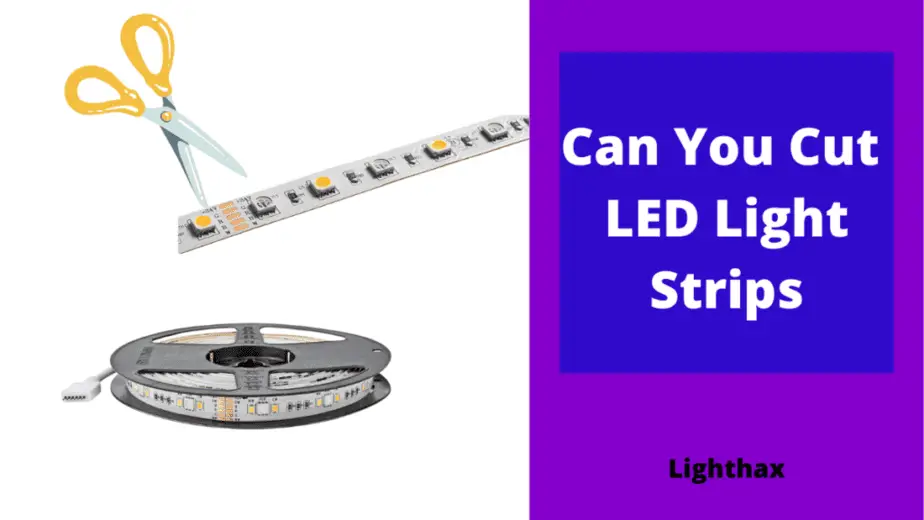
Can You Cut LED Light Strips?
In short, yes, you can cut LED light strips and still make them work. However, there are some things you need to ensure first.
Unfortunately, not all LED light strips can be cut. You need to purchase the products that allow you to make modifications on the strip.
We can’t surely say that the LED light strip you have will work after cutting, so you need to be very careful and thorough when researching exactly which light strip to buy.

A good idea is to look at the product description beforehand. Additionally, read through the reviews from previous buyers to see if you find any useful information.
The cutting process itself is fairly simple. But believe it or not, a lot of people tend to get this process wrong and ruin perfectly working LED strips in the process.
So, we recommend doing very thorough research and read through the procedure very carefully again and again to make sure you get every single thing right.

Where to Cut LED Light Strips
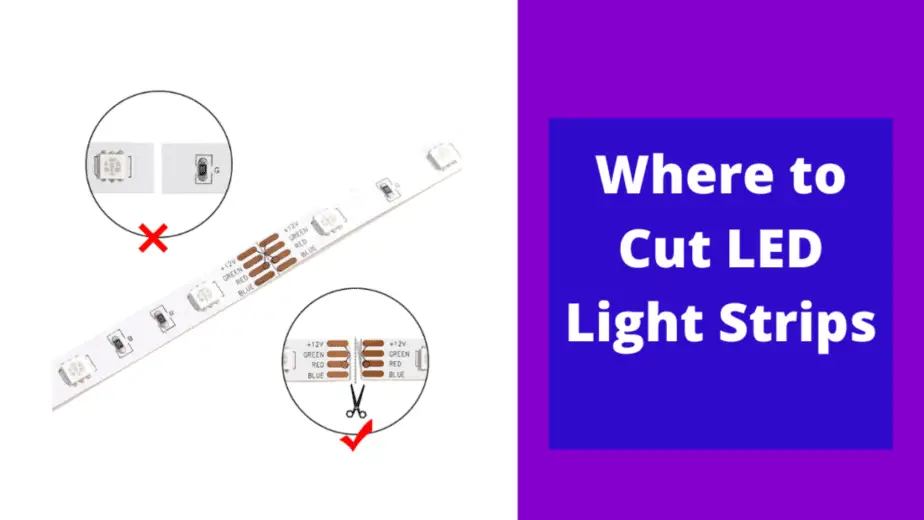
As a rule of thumb, look for marked cut lines on the strip itself. The line maybe dotted or solid, depending on the brand.
LED light strips are divided into separate circuits marked by these lines. The lines indicate where one circuit ends and another one begins, thus making that spot ideal for cutting.
Cut anywhere else on the circuit and it will probably no longer work.
The cut lines also have copper soldering pads on the backside. A very simple strategy to follow is to cut through the middle of these lines, because you want to have the copper sections exposed at the end of your newly cut strips.
In order for the newly cut pieces to work, you want an uninterrupted flow of electricity through the circuits. Leaving the copper pads exposed allows you to connect connectors to them, thus ensuring flow of power as well as preventing any electrical hazards from occurring.

How To Cut LED Light Strips
Step 1: Determine the Ideal Length
Before going into the cutting process, you need to identify exactly how long you need your cut strips to be. A good idea is to measure the surface you’re going to stick the strip to.
For example, if you want to stick the strip to the back of your computer monitor, start by measuring the length of the area behind the monitor where you’ll stick the strip.
Once you have determined that length, measure out that length on your led strip.

Step 2: Identify the Cut Line on The LED Strip
Now there is a chance that there won’t be a cut line at the exact length you have measured. In this case, what you need to do is find the cut line nearest to that length on your strip.
In most products, you’ll see these shiny orange-brownish copper pads or dots that are placed between every set of lights.
There will be a dotted line running vertically through the middle of these copper pads. That is the exact line you want to cut the strip at.
If you don’t cut along these lines, you may disrupt a circuit causing a few or all the lights to stop working.
As an added indicator, some strips will also have a dotted line on the backside of these copper strips with the symbol of a scissor indicating the line. You can also use that line as reference.
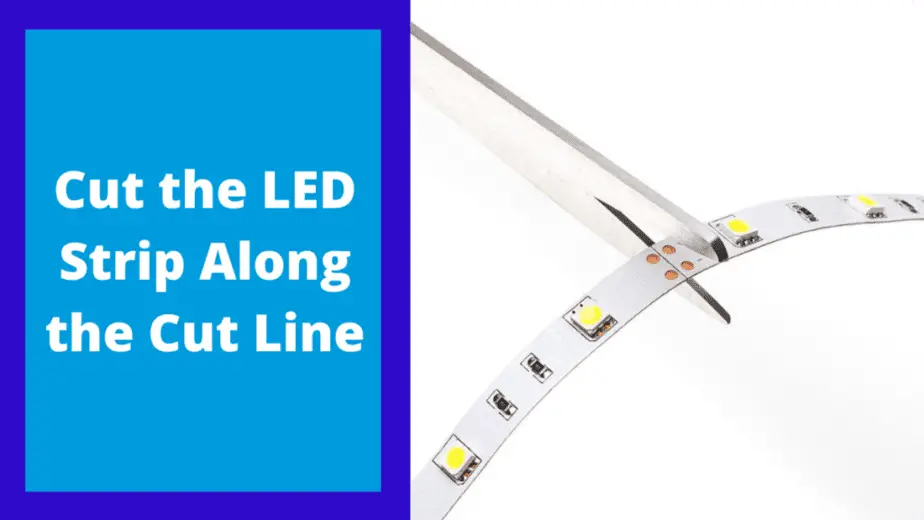
Step 3: Cut the LED Strip Along the Cut Line
Now that you have identified the line, its time to cut the strip.
The best option is to use a pair of scissors, as something like a box cutter or a knife may slip and cut outside the cut line.
Make sure the scissors are sufficiently sharp before cutting. Using a blunt pair of scissors may damage the copper pads.
Carefully cut along the cut line. Apply just enough pressure to cut the strip.

How To Fix LED Strip Lights When Cut
Now that you have successfully cut your LED strip, you will be able to use one of the cut portions using the connector, controller and power supply that came in with the original product.
But don’t worry, you will still be able to use the other portion of the strip. However, in order to do so, you will need to purchase an additional connector. There are various kinds of connectors depending on your preference such as straight-line connectors, 90-degree angled connectors, wired connectors, etc.
Once you have a connector, here are the steps you can follow to reconnect/fix the additional LED strip that you have:
- Take off the cover of the connector. Some connectors will have a plastic cover to protect the inside, make sure to take it out beforehand.
- Make sure you get the polarity of the strips correct. Strips connected with opposite polarities will not light up.
- Take the cut end of the LED strip and carefully insert it into one end of the connector. Make sure that the copper pads are clean before doing so.
- If connected successfully, you should hear a click.
- Do the same on the other end of the connector.
- If the connector you’re using comes with a cover, make sure to close it after inserting the strip ends.
- Plug the strip into a power source and check to see if it is working properly.
- If the lights are not functioning properly, check whether you’ve inserted the strips into the connector properly. Additionally, check to make sure that you cut along the cut line.
Can You Cut Govee Brand LED Light Strips
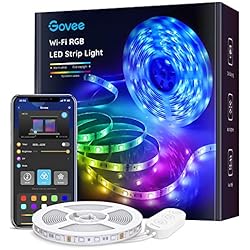
Govee is a renowned and dependable brand to consider when purchasing LED strip lights. From what we understand, most Govee brand LED strip lights can be cut.
In most cases, the Govee brand strip lights have cut lines marked on the strips for easy operation.
We should mention that Govee also manufactures RGBIC strip lights. Unfortunately, these light strips cannot be cut. Cutting these strips will cause them to malfunction.
App controlled smart LED strip lights work with Alexa, Google Home and music sync capabilities.
Which LED Light Strips Can’t Be Cut
Unfortunately, there are some particular kinds of LED light strips that cannot be cut.
As a general rule, check for cut lines on the strip when researching. Ideally, if there are no cut lines explicitly marked on the strip, you shouldn’t cut them.
Another kind of LED light strips available at the market are LED strips containing IC chips. IC stands for integrated circuit. Basically, an IC chip is a chip containing a set of microscopic circuits that have multiple functions.
The LED light strips will typically have IC chips after every few sets of lights. These chips allow you to individually control each LED or group of LEDs.
As a result of this, the LED lights are controlled by each individual chips. Cutting the strips will damage the sequence that the chips are connected in, causing the entire strip to malfunction or stop working completely.

Will Both Sides of LED Lights Work if You Cut Them?
As long as you cut along the cut line on the copper pads, you should be able to use both sides of the LED strip.
Cutting along the cut line ensures that the copper pads are exposed on each cut ends of the strip. This is vital for the cut strips to work because the copper pads need to have an uninterrupted flow of electricity once they are connected to power.
However as said earlier, you do need to purchase an additional connector in order to connect the additional cut piece to power.
When you’re reconnecting the cut pieces to power, make sure you get the polarity correct. Otherwise, electricity won’t pass through the circuits. Looks for the markings on the strip indicating the correct polarity.
Even if the polarity is not pointed out, you can determine it by trial and error. Getting the polarity incorrect will not damage the strip, the lights will just not light up until you get the polarity right.

What to Do if Your Light Strips Don’t Work After You Cut Them
If the lights don’t work after reconnecting the newly cut LED light strip portions, you can do the following things to ensure they are working properly.
First, take the strip out of the connector and check if the cut was made correctly. On a correct cut, both sides of the LED strip will have exposed copper pads.
If you find out that the cut was made incorrectly, simply make another cut at the nearest cut line. You will lose functionality of a small portion of the strip, but you should still be able to use most of the strip.
Make sure the cut ends as well as the connector are clean. Check to see for dust and other debris inside the connector. Blow on the connector or use a brush to clean it out.
Make sure you get the polarity correct. If you do not know how to identify the polarity, connect both sides to see which works.
Finally, make sure that the controller or the adapter/plug itself is working.
WENHSIN– 4-Pin RGB LED Light Strip Connectors
LED strip light connectors to connect led strip lights without soldering.
Is It Possible To Reconnect Cut LED Light Strips
Use the following process to reconnect cut LED light strips:
- Take the protective cover off the connector if it comes with one.
- Insert the cut ends into a connector. Make sure the polarity is correct.
- If your connector has clamps/clips, make sure they snap in place after inserting the strips.
- Plug the strip into a power source.
FAQs
Can I cut my LED strip lights?
Yes, LED strip lights often come with designated cut points along the strip. You can trim them to fit your desired length.
What if my lights aren’t working after cutting?
If your LED strips are not working post-cutting, first ensure that you’ve cut along the marked lines. If the issue persists, check if the LED chips or resistors are damaged. Connecting the two cut ends with a proper connector or using connector clips can sometimes resolve the problem.
What should I do if a LED on my strip is broken?
If a LED on your strip is broken, it may not affect the whole strip. You can use a new LED or resistor to fix the problem. High-quality LED strips may still work even if a part of the strip is damaged.
My LED strip lights are in the wrong place. How do I fix this?
If your strip lights are in the wrong place, consider using a connector to join the cut ends or adding a new LED strip. Ensure you connect the power supply directly to the strip to maintain functionality.
Why are my LED strip lights showing inconsistent light?
Inconsistent lighting may occur due to variations in wattage or faults in the LED chips. Ensure the wattage of all your LED strips matches, and use a connector to provide uniform power supply.
What can I do if my LED strip lights won’t work anymore?
If your LED strips won’t work, check the power supply, and make sure it matches the requirements of your LED strip. Additionally, inspect for cut marks or damaged components and use a connector or connector clips to fix the issue.
Conclusion
There you go. Now you know how to cut LED light strip lights into usable pieces. Being able to cut a longer piece will allow you to use the lights in different areas for different purposes, increasing your decorating options to a great extent.
In case you don’t like your segmented LED strips and want to go back to having a longer strip, you can also use our guide on how to reconnect LED light strips using connectors.
As long as you follow all the information provided above thoroughly and carefully, you should not run into any problems.
Finally, always be very careful when dealing with electrical components. Constantly make sure that none of the components you’re working on are connected to power. Remember, safety should be your number one priority.

My strong expertise is illuminating spaces. With a keen eye for detail and a passion for transforming environments through lighting, my dream is to leave indelible mark on the world of light design. Below are few facts of my biography, highlighting career and hobbies. Click here to contact me.


